Tuesday, June 29, 2010
Cheeseburger Macaroni
Ok, so it's obvious I enjoy pasta, and it's obvious I enjoy macaroni and cheese. My husband enjoys all of that too, but I needed something a smidge different. So...I added meat. Sweetness, right? Oh yeah. Cheeseburger macaroni, all homemade, none of that from a box stuff. Ick. I know, I know...I'm a food snob now cause I don't like boxed dinners. Meh. I can live with that. ;) This was so good. It made a ton, and I ate it for like 4 days straight from the leftovers. Me...eating something for 4 days straight at all, not to mention that it was leftovers, is nothing short of a miracle, so I guess I liked it. Haha. I hope you do too.
Ingredients:
-elbow macaroni- 1 lb
-ground beef- 1 lb
-4 cups grated cheese, 1 cup reserved for the top (I used colby jack, but use whatever you like)
-1.5 cups heavy cream
-1 cup 2% milk
-3 tablespoons butter
-2 tablespoons flour
-1 egg
-salt and pepper to taste
-1.5 tablespoons mustard
-3/4 cup plain tomato sauce (you could probably use ketchup, but to me, ketchup is a little too vinegary or something)
Directions:
Bring a pot of water to a boil. Cook the macaroni until just underdone. It will cook more in the oven. Drain and set aside.
In a large pot over medium high heat, cook the ground beef until no longer pink. Drain the meat and return it to the pot. Add the mustard and tomato sauce, and stir until it's mixed in well with the meat. Set aside.
In a sauce pan over medium low heat, melt the butter. Whisk in the flour until well combined. Continue cooking another few minutes, stirring frequently. Add the cream and milk, and whisk frequently until the flour mixture is combined well and the sauce begins to thicken. Beat an egg in a separate bowl. Temper the egg by adding a few tablespoons of the sauce to the egg. Whisk it together until well mixed. Add the egg mixture slowly back into the sauce pan, incorporating the egg well in the mixture. Add the cheese and let the sauce melt it, stirring frequently. When the cheese is all melted and the sauce is well combined, add the salt and pepper. I probably used about a teaspoon of salt and a half teaspoon of pepper.
In a large baking dish (I used a 9 x 13 glass dish), pour the macaroni, meat, and cheese sauce. Stir it all together so everything is nicely incorporated.
Sprinkle the reserved cheese over the top so there's a nice layer. Bake it in a 350 degree oven for about 30 minutes, until everything is melted and bubbly and hot and delicious.
Serve immediately. Mmmmm.
Chicken Pizziola
We eat a lot of chicken in my house. It's just a fact of life. Haha. I try to come up with new stuff to do with it so it doesn't get boring. I am a fan of Chicken Parmesan, and this is kind of a twist on that, to make it interesting. Chicken, Pepperoni, pasta sauce, Mozzarella...all amazing things in my book. So putting them together? Yes please.
Ingredients:
-Chicken Breasts (I used one cause I wasn't making much)
-Spaghetti (you could use any type of pasta, really, I just had some spaghetti on hand)
-tomato pasta sauce
-pepperoni, chopped into small pieces (use as much as you want)
-mozzarella cheese, shredded, to put over the top
Directions:
In a skillet, melt some butter over medium high heat. Cube the chicken and cook it until no longer pink in center. Add the chopped pepperoni and just heat it up a bit with the chicken.
While that's cooking, boil a pot of water. Cook the spaghetti until just al dente. Don't over cook it. Drain and return to pot. Add the chicken and pepperoni. Pour in enough pasta sauce to coat everything well. At this point, you can just dump everything in a baking dish if you want, but I made individual servings in ramekins just for fun. Scoop the pasta mixture into the baking dish, and top with lots and lots of mozzarella. Bake in a 350 degree oven for about 20-30 minutes, until the mozzarella is melted and everything is hot and bubbly. Serve immediately and enjoy. Yum!
Cheesy Chicken and Broccoli
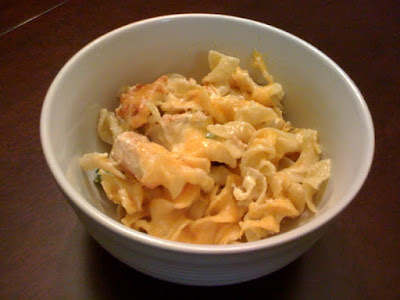
So I recently found out that broccoli is one of the best veggies you can eat. Amazingly, it is also one of the veggies this picky girl will eat. Halleluah! Haha. But anyway...broccoli always tastes better with cheese. And dinner at my house usually contains some sort of meat or protein. So put all that together, and what do you have? Cheesy Chicken and Broccoli. This was kind of an experiment, and I was very happy with the outcome. I ate the leftovers the next day for lunch, and if I can eat something twice in a row like that, it has to be good. Haha. So, without further ado, Cheesy Chicken and Broccoli.
Ingredients:
-Chicken breasts (I made a smaller casserole, so I only used one large one)
-Broccoli-as much as you want. For my small casserole, I used just about one head of it. Cut it into smaller florets.
-Egg noodles-I used a half package of them
-3 tablespoons butter
-2 tablespoons flour
-1 cup heavy cream
-1 cup 2% milk
-3 cups shredded cheese (I used colby jack, but use whatever), with a little bit reserved for sprinkling on the top
Directions:
Cook and cube the chicken breast(s). Set aside.
While the chicken is cooking, boil a pot of water. Add the egg noodles, and cook according to package directions. Don't overcook them, though, since they'll cook a smidge more in the oven later. Drain the noodles, but reserve the water, return it to the same pot, and reheat it to boiling (I actually just used a slotted spoon to scoop the noodles out and into my baking dish, leaving the hot water behind). Add the broccoli florets, and cook for just a couple minutes. You're basically blanching them. They'll cook more in the oven too. Drain the broccoli.
While all that's going on, melt the butter into a sauce pan over medium low heat. Add the flour, and whisk it together, combining it well. Let it cook a few more minutes, whisking frequently. Add the cream and milk, and whisk everything together. Let the dairy products warm up. Then add the cheese. Stir it frequently until the cheese is melted and combined well. Season it with salt and pepper to taste.
Pour the drained noodles into a glass baking dish. Add the chicken and broccoli. Pour the cheese sauce over the top of everything.
Stir it to combine everything. coat it well in the cheese sauce. Finally, sprinkle the reserved cheese over the top. Bake it in a 350 degree oven for about 20-30 minutes, until the cheese on top is melted and everything is hot and bubbly and amazing. Serve immediately and enjoy!
Sunday, June 20, 2010
Stuffed Pasta Shells
Have a I mentioned before that I like pasta? I have? Oh, ok. Sorry. ;)
I am still amazed sometimes at many variations of pasta there are. And with each type of pasta, you can do so many applications. It's insane. And so wonderful. Haha.
This time, I used big shell pasta, and stuffed them, and then baked them. Can we say, amazing? Yes we can. I hope you enjoy!
Ingredients:
-Large shell pasta
-Ground beef
-Mozzarella cheese, shredded
-tomato pasta sauce
Directions:
In a large pot, boil some water. Add the pasta and cook until just barely al dente. They'll cook a smidge more in the oven, so don't overcook them. Drain them, and let them cool just slightly in some cool water, so they don't get too sticky or brittle while you stuff them.
In a skillet over medium high heat, cook the ground beef until no longer pink. Drain, and let cool. Take the pasta sauce, and pour a little bit into the bottom of a baking dish. This will keep the pasta from drying out and sticking to the baking dish. Take one pasta shell, and spoon some of the beef into it. Then take a little bit of the cheese and stuff it in there too. Lay the shell into the baking dish, with the open side up. Repeat with the shells until the baking dish is full. Pour sauce over the shells to cover, but not drown, them. Sprinkle mozzarella over the top, as generously as you'd like. Place in a 350 degree oven for about 20-30 minutes, until everything is hot and bubbly and the cheese is melted and yummy. Serve immediately and enjoy. Yum.
Wow.
It has been entirely too long since I posted. I sincerely apologize. In the past month, I have traveled halfway across the country, started a new job, and just been super busy or something. I'm afraid my "excuses" are not valid justification, but I had to try. ;) I will be trying to post more again soon. Thanks for you patience! Have a great day!
Saturday, June 12, 2010
Sloppy Joes
I was looking for an easy, simple, but tasty meal I could make quickly on nights when I am working during the day. My husband was incredibly too excited when he found out I was making sloppy joes. Haha. He's such a kid at heart.
This really is simple, though. I made mine from scratch, and personally, I think it tastes way better than a pre-packaged can-o-meat product. Very few ingredients, yummy results. Away we go.
Ingredients:
-Ground beef (I would say at least 1/4 lb per sandwich-I used a lb)
-Ketchup-I eye-balled it, but it was probably around 1 cup for a lb of meat
-1.5 tablespoons chili powder
-2 teaspoons cumin
-1 tablespoon garlic powder
-1/2 tablespoon onion powder
-Hamburger buns
Directions:
Brown the ground beef in a skillet or pot over medium high heat. I used the same pot I made the sloppy joes in; fewer dishes to wash. :) When the meat is cooked through and no longer pink, drain it. Return the drained meat to the pot, and reduce heat to medium. This is going to be kinda like a thick chili. You don't want a ton of liquid, but you don't want it to be too dry. You want it wet enough to stick together well, but dry enough that it will stay on the bun without completely slopping out. Start adding the ketchup sparingly, and add more if it's needed till the consistency is right. Add the ketchup and seasonings, stirring to combine well. When the mixture is well combined, reduce the heat to medium low, and let the meaty goodness cook a little longer, about 10 minutes, stirring occasionally, until the flavors have had time to permeate the meat really well. Yummmmmm. When the sloppy joes filling is done cooking, scoop a generous helping onto the hamburger buns. Like I said, about 1/4 lb per sandwich, so 1/4 of the cooked meatiness. If you'd like, you can add a piece of American cheese to the sandwich (as my husband preferred), or leave it plain (as I preferred). Either way, delicious. And really, not that unhealthy. Yum. I really want one right this second.
Yes please. Enjoy!
Thursday, June 3, 2010
Taco Pie
Hello all! Sorry I haven't posted in a while. I've been out of town, and therefore not cooking or planning meals. Haha. But here is my Taco Pie.
This is easy. It's messy, and not terribly pretty in pictures, but it is yummy. My husband loved it. I have had a request to make it again someday. Haha. I guess that's a victory. I hope you enjoy it too. Here we go!
Ingredients:
-Tortillas, at least 3, and soft taco sized
-Ground beef, about a lb, cooked and seasoned with taco seasoning
-Shredded cheese, about 3 cups
-refried beans (I used canned), about 1 cup or so
-red enchilada sauce, about 1 cup
-sour cream, about 2 cups
Directions:
Toast the tortillas under the broiler in the oven until just brown and a little bit firm. This will be the "pie crust" so you want it to be a little crunchy. Place the crunchy tortilla in the bottom of a round 8 in. cake pan. Spread about half of the refried beans onto the tortilla. Sprinkle about 1/4 of the cheese onto the beans. Pour in about half the enchilada sauce, and try to get it as evenly spread as possible. Then add about half of the ground beef. Spread the layer evenly. Spread half the sour cream over the beef as evenly as possible. This will be a little challenging. ;) Add about a third of the remaining cheese.
Top with another crunchy tortilla.
Repeat the layers a second time. When you have placed the last tortilla on top of all the layers, sprinkle the remaining cheese on top. Bake it in a 350 degree oven for about 20-30 minutes, until all the cheese is melted and everything is hot and bubbly inside. Let it cool just slightly, then cut a "slice" for everyone. It will be a messy ordeal, but it will taste yummy. Serve it hot and enjoy!
Subscribe to:
Posts (Atom)