Mmm pizza. And tacos. I like both. Why not combine them? Ok, let's do that.
As usual, my husband and I needed our weekly pizza fix. I decided to try a taco pizza. Yum. I have seen taco pizza at several pizza places, but...I'm not a fan of the lettuce and such they put on top of it usually. Who wants lettuce on pizza? Gross. I don't really like lettuce anyway, so lettuce on pizza is a definite no-go for me. So I made up my own taco pizza.
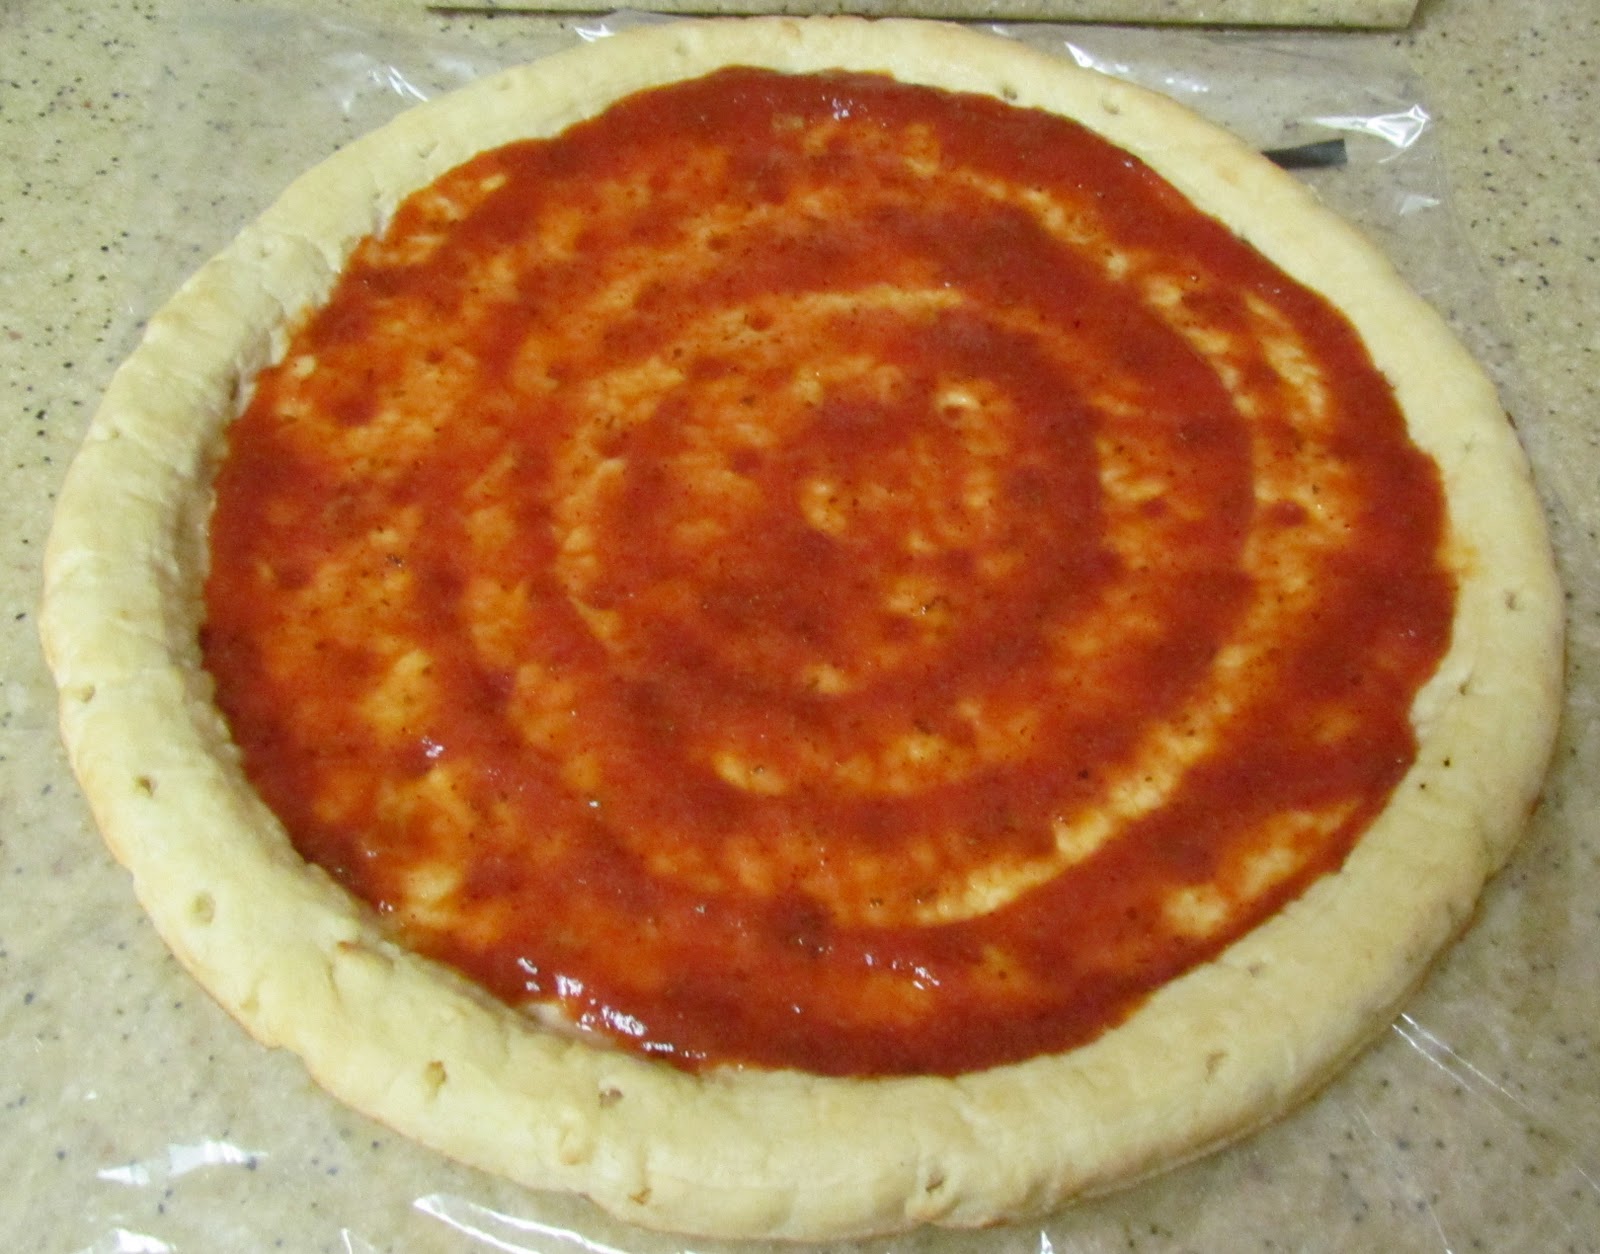
I started with a PLAIN pizza crust. While some spices from Italian and Latin cooking overlap, not all do, so I'd prefer to start with a neutral base. Then I mixed up a taco-seasoned tomato sauce. Once again-the Italian kind just wouldn't cut it. Plain tomato sauce would be too boring for something like this. The solution was mixing up my own sauce. Add your favorite type of taco cheese (I used cheddar, but colby jack, Monterey jack, or queso blacno would be awesome), and you're golden! Let's get crackin'!
Ingredients:
For sauce-
-3/4 cup plain tomato sauce
-1 teaspoon garlic powder
-1/2 teaspoon onion powder
-1/2 teaspoon cumin
-1/2 teaspoon chili powder
-1/2 teaspoon dried cilantro
For meat-
-1/3 lb ground beef
-1/3 cup water
-1 teaspoon garlic powder
-1/2 teaspoon onion powder
-1/2 teaspoon cumin
-1/2 teaspoon chili powder
For Pizza-
-1 pizza crust (mine was a store bought one)
-prepared sauce
-prepared beef
-3/4 cup cheddar cheese
Directions:
In a small bowl, mix together the sauce ingredients until well combined.
Set aside.
In a skillet, place the ground beef and cook over medium/medium-high heat. Drain the grease and return meat to pan. Add the water and spices and stir to combine. Reduce heat to medium.
Let the liquid be absorbed by the meat, stirring occasionally. When the liquid is gone, remove the meat from the heat and set aside.
Lay out the pizza crust. If the crust needs to be half-baked before topping, bake according to package directions. Spread a thin layer of the seasoned sauce over the crust.
Add the ground beef evenly over the pizza.
Sprinkle with cheese.
Bake at 425 (or package directions) for about 10-12 minutes until the crust is golden and the cheese is melted and yummy.
Cut in slices and enjoy!
Saturday, January 15, 2011
Wednesday, January 12, 2011
Update: Cream Cheese Chicken
It has been almost exactly one year since I started this blog on January 15th last year. I can't believe that. What a year it's been! Thank you to all of my readers who have kept up with the blog.
As time goes by, I make some of the same recipes that are posted on my blog, but I think I tend to improve them. And I think my pictures have gotten better...I hope anyway. Haha. This is one of those recipes. I won't say that I am overly conscientious about food ingredients. We still eat quite a few processed foods, and I use convenience items sometimes, and well...snacks foods are a weakness of mine. But I will say that on the rare occasion I actually do make improvements on the health side of things, I should probably share it. Haha. So I think that's the case with this. The original recipe from January 30th of last year (found here), contained a can of condensed cream of chicken soup, cream cheese, and a pre-made Italian seasoning packet, which I'm sure had lots of sodium and some preservatives and whatnot. I actually made my own cream of chicken soup last time, but I used heavy cream for it, so...yeah. Anyway, I made a couple minor improvements that I hope some of you health and/or weight conscious readers might find more to your liking. This will still not be considered a "healthy" meal, but it's healthiER. Haha. Have fun!
Ingredients:
-5 tablespoons butter, divided
-2 tablespoons flour
-1.5 cups 2% milk
-1/2 cup chicken broth
-2 chicken breasts
-8 oz block reduced fat cream cheese
-1 teaspoon onion powder
-1 tablespoon garlic powder
-2 tablespoons garlic herb seasoning mix (not a packet, one of those spice mix shakers you can get. I use this one all the time)
-a starch to serve it over (I use egg noodles; rice or something is fine too)
Directions:
In a large pot, melt 2 of the tablespoons of butter over medium heat. Add the chicken breasts. Sprinkle on the garlic powder, onion powder, and seasoning mix.
Cover with the pot lid and cook for about 10 minutes, turning the chicken over after 5 minutes.
At this point, I remove the chicken, cut it into bite sized pieces, and then return it to the pot.
It probably won't be completely cooked through, but that's ok. I add one more tablespoon of butter so nothing will burn on the bottom of the pot before I can add the other ingredients.
While the chicken is cooking, I heat 2 tablespoons of butter over medium/low heat in a medium skillet. Whisk in the 2 tablespoons of flour to make a roux. I added the milk in 3 parts (1/2 cup at a time) so that it would have a chance to thicken each time before adding more. Since the milk is low-fat, it takes a little longer to thicken up than a higher fat milk or cream would, so adding it slowly helped the roux thicken it more easily. Whisk frequently to keep the milk from boiling, but let it thicken by sitting still for just a bit. Once the milk is all added, reduce the heat to low and let it continue to thicken, stirring frequently, until you get the chicken all cut up and ready to go.
Start a pot of water boiling when you start the milk mixture. Once it's boiling, cook the egg noodles, stirring occasionally, until tender. Drain and set aside.
Add the milk mixture and chicken broth to the large pot with the chicken, and stir to combine.
Let everything meld together, stirring occasionally. Add the cream cheese in chunks and let it melt into the mixture, stirring frequently.
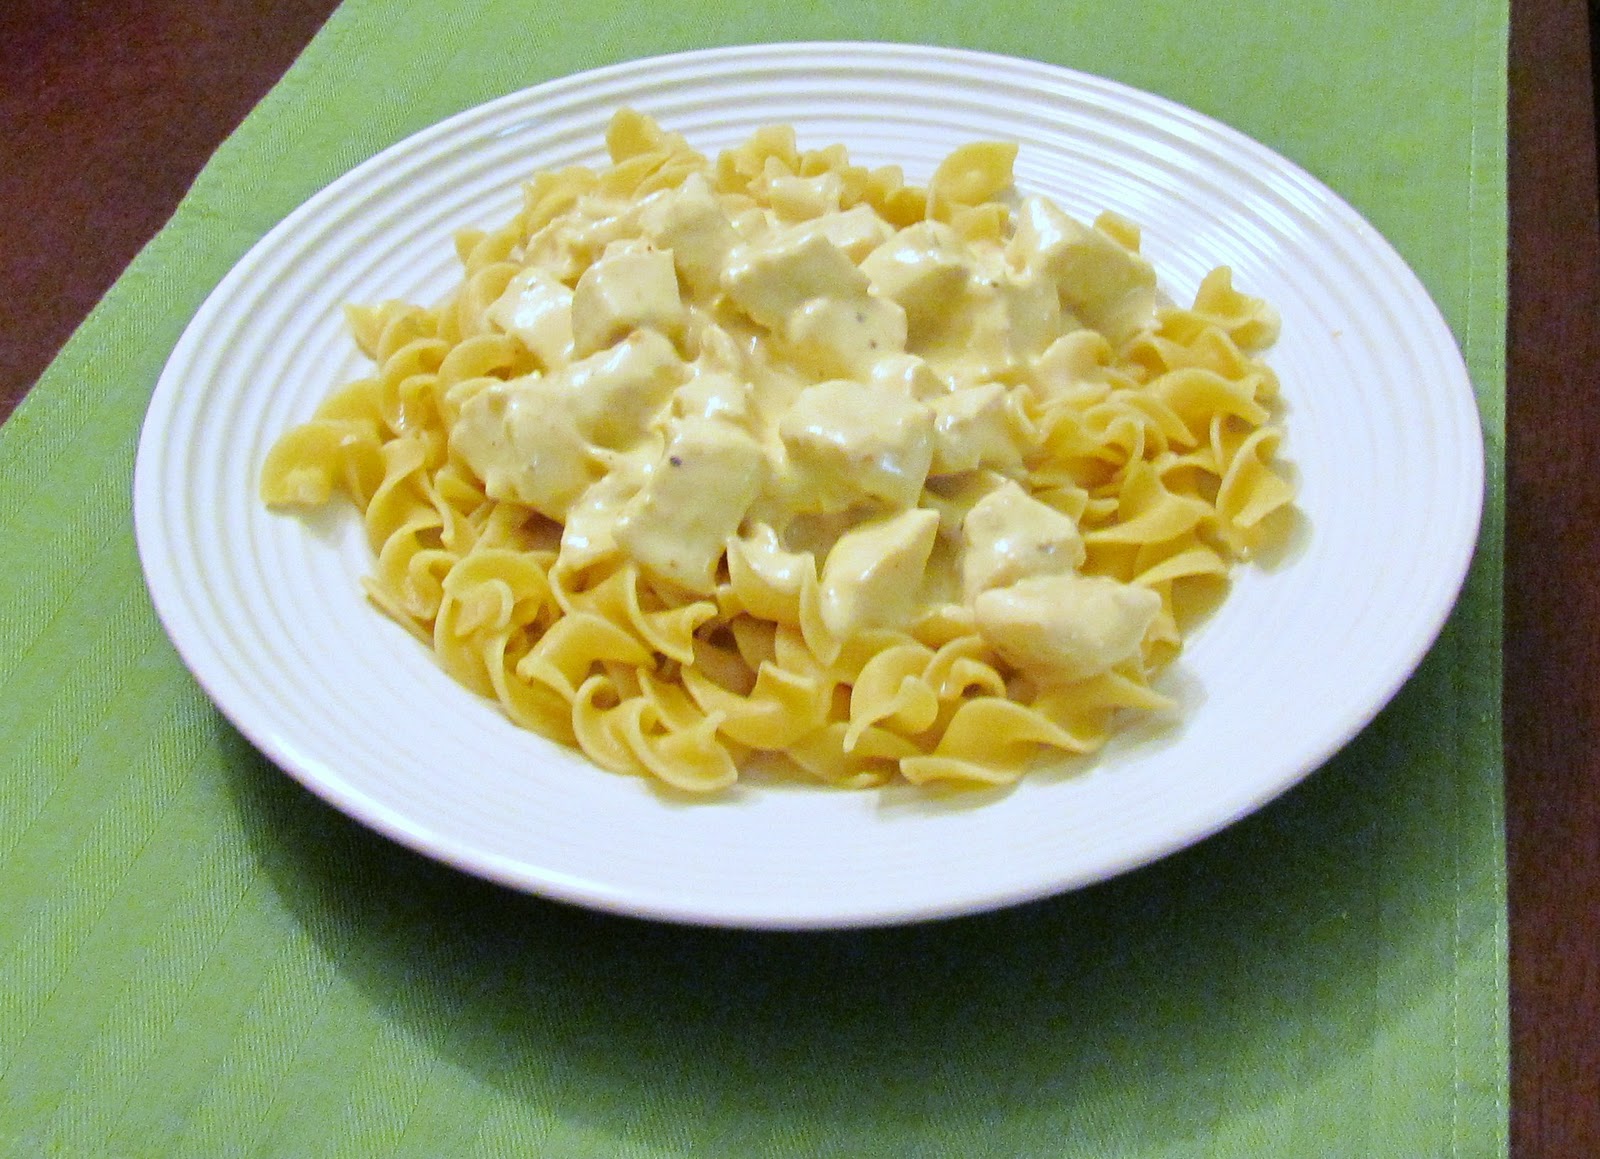
Once it's all melted and well combined into the other ingredients, taste test the seasoning and adjust it as needed. I think I added a little more to mine, but it depends on your taste. Serve the hot chicken mixture over the egg noodles and enjoy! Yummy!
As time goes by, I make some of the same recipes that are posted on my blog, but I think I tend to improve them. And I think my pictures have gotten better...I hope anyway. Haha. This is one of those recipes. I won't say that I am overly conscientious about food ingredients. We still eat quite a few processed foods, and I use convenience items sometimes, and well...snacks foods are a weakness of mine. But I will say that on the rare occasion I actually do make improvements on the health side of things, I should probably share it. Haha. So I think that's the case with this. The original recipe from January 30th of last year (found here), contained a can of condensed cream of chicken soup, cream cheese, and a pre-made Italian seasoning packet, which I'm sure had lots of sodium and some preservatives and whatnot. I actually made my own cream of chicken soup last time, but I used heavy cream for it, so...yeah. Anyway, I made a couple minor improvements that I hope some of you health and/or weight conscious readers might find more to your liking. This will still not be considered a "healthy" meal, but it's healthiER. Haha. Have fun!
Ingredients:
-5 tablespoons butter, divided
-2 tablespoons flour
-1.5 cups 2% milk
-1/2 cup chicken broth
-2 chicken breasts
-8 oz block reduced fat cream cheese
-1 teaspoon onion powder
-1 tablespoon garlic powder
-2 tablespoons garlic herb seasoning mix (not a packet, one of those spice mix shakers you can get. I use this one all the time)
-a starch to serve it over (I use egg noodles; rice or something is fine too)
Directions:
In a large pot, melt 2 of the tablespoons of butter over medium heat. Add the chicken breasts. Sprinkle on the garlic powder, onion powder, and seasoning mix.
Cover with the pot lid and cook for about 10 minutes, turning the chicken over after 5 minutes.
At this point, I remove the chicken, cut it into bite sized pieces, and then return it to the pot.
It probably won't be completely cooked through, but that's ok. I add one more tablespoon of butter so nothing will burn on the bottom of the pot before I can add the other ingredients.
While the chicken is cooking, I heat 2 tablespoons of butter over medium/low heat in a medium skillet. Whisk in the 2 tablespoons of flour to make a roux. I added the milk in 3 parts (1/2 cup at a time) so that it would have a chance to thicken each time before adding more. Since the milk is low-fat, it takes a little longer to thicken up than a higher fat milk or cream would, so adding it slowly helped the roux thicken it more easily. Whisk frequently to keep the milk from boiling, but let it thicken by sitting still for just a bit. Once the milk is all added, reduce the heat to low and let it continue to thicken, stirring frequently, until you get the chicken all cut up and ready to go.
Start a pot of water boiling when you start the milk mixture. Once it's boiling, cook the egg noodles, stirring occasionally, until tender. Drain and set aside.
Add the milk mixture and chicken broth to the large pot with the chicken, and stir to combine.
Let everything meld together, stirring occasionally. Add the cream cheese in chunks and let it melt into the mixture, stirring frequently.
Once it's all melted and well combined into the other ingredients, taste test the seasoning and adjust it as needed. I think I added a little more to mine, but it depends on your taste. Serve the hot chicken mixture over the egg noodles and enjoy! Yummy!
Sunday, January 9, 2011
Asian Meatballs
Yum. Meatballs in an Asian sauce over white rice. Woohoo. This was an experiment that turned out well, so I'm glad. I will admit, Asian flavors are not my forte. Sometimes they go well, and sometimes...they...don't. But I keep trying, hoping someday I'll get better at gauging the flavors and all. I think part of my problem is that so many Asian flavors are so strong, and I just don't know how to combine them without it becoming overwhelming. However...this time, I managed to make it work. I did a happy dance when I finally tasted it. Not gonna lie. My husband thought I was losing it, but hey. I was excited.
I also only used 1/2 lb of ground beef for my meatballs, since it was just the two of us eating. I think if you had a side dish to go with this, it would be enough for four people. It was definitely enough for three, since my husband and I both had PLENTY and I have another serving in the fridge awaiting lunch sometime soon. Anyway...I think this would be enough to feed 3-4. Double it if you need more. :) Away we go.
Ingredients:
For meatballs-
-1/2 lb ground beef
-1 egg
-1/3 cup breadcrumbs
-1 teaspoon onion powder
-2 teaspoons garlic powder
-flour for dredging (maybe 1/2 cup or so?)
For sauce-
-1 teaspoon Hoisin sauce (available in most grocery stores in the Asian food sections)
-2 tablespoons soy sauce
-2 tablespoons rice vinegar
-1 cup beef broth
-1 teaspoon onion powder
-1 tablespoon garlic powder
-1 teaspoon ground ginger
-1/2 cup brown sugar
-1 tablespoon cornstarch
Directions:
In a medium bowl, combine all the meatball ingredients (except the flour). Make sure the ingredients are well incorporated, but don't over work the meat. That will mean tough meatballs, which is a bad thing. Pinch off small sections of the meat and roll them into meatballs, approximately 1 to 1.5 inches in diameter.
Dredge each meatball in the flour until lightly coated.
Remove as much of the excess flour as possible. I did this by gently moving the meatballs from one hand to another, tapping off the flour as it moved from hand to hand.
In a large skillet, heat vegetable oil over medium/medium high heat. Place the meatballs in the heated oil
and cook until no longer pink in center. You'll need to flip them around a couple times to brown the whole outside and so they cook evenly.
I had to do my meatballs in batches cause my skillet wasn't quite big enough for all of them, so don't worry if you need to do that too. When the meat is cooked, remove the meatballs to a plate and let them rest for a minute while you finish the sauce.
Speaking of sauce...while the meat is cooking, combine the Hoisin sauce, soy sauce, onion powder, garlic powder, ginger, rice vinegar, and most of the beef broth in a saucepan over medium heat.
Reserve about 1/4 cup of the broth for later. Whisk the ingredients together until well combined. In a separate small bowl, whisk the cornstarch with the remaining beef broth. Add this mixture to the sauce pan, stirring frequently. When the cornstarch is well incorporated, add the brown sugar to the sauce pan and whisk into the sauce. Let the sauce come to a boil, stirring frequently. Reduce the heat to medium low so it can simmer a little bit. It should start to thicken slightly because of the cornstarch. Make sure to stir it frequently.
Remove the oil from the skillet you cooked the meatballs in. Pour the sauce into the skillet and continue stirring occasionally over medium heat. It will simmer a little bit, but don't let it get too hot or else the sugar will burn and be disgusting. The sauce should continue to thicken slightly. Add the meatballs to the skillet and coat them well with the sauce.
Continue cooking until the sauce has cooked down and become almost like a slightly liquid glaze, and the meatballs remain coated with the sauce.
Serve over rice (I used instant white rice), or rice noodles, or whatever Asian carbohydrate you prefer. The flavor of the meatballs in the sauce will be relatively strong, so a more neutral base would be best.Yay for a successful Asian-style meal! :)

I also only used 1/2 lb of ground beef for my meatballs, since it was just the two of us eating. I think if you had a side dish to go with this, it would be enough for four people. It was definitely enough for three, since my husband and I both had PLENTY and I have another serving in the fridge awaiting lunch sometime soon. Anyway...I think this would be enough to feed 3-4. Double it if you need more. :) Away we go.
Ingredients:
For meatballs-
-1/2 lb ground beef
-1 egg
-1/3 cup breadcrumbs
-1 teaspoon onion powder
-2 teaspoons garlic powder
-flour for dredging (maybe 1/2 cup or so?)
For sauce-
-1 teaspoon Hoisin sauce (available in most grocery stores in the Asian food sections)
-2 tablespoons soy sauce
-2 tablespoons rice vinegar
-1 cup beef broth
-1 teaspoon onion powder
-1 tablespoon garlic powder
-1 teaspoon ground ginger
-1/2 cup brown sugar
-1 tablespoon cornstarch
Directions:
In a medium bowl, combine all the meatball ingredients (except the flour). Make sure the ingredients are well incorporated, but don't over work the meat. That will mean tough meatballs, which is a bad thing. Pinch off small sections of the meat and roll them into meatballs, approximately 1 to 1.5 inches in diameter.
Dredge each meatball in the flour until lightly coated.
Remove as much of the excess flour as possible. I did this by gently moving the meatballs from one hand to another, tapping off the flour as it moved from hand to hand.
In a large skillet, heat vegetable oil over medium/medium high heat. Place the meatballs in the heated oil
and cook until no longer pink in center. You'll need to flip them around a couple times to brown the whole outside and so they cook evenly.
I had to do my meatballs in batches cause my skillet wasn't quite big enough for all of them, so don't worry if you need to do that too. When the meat is cooked, remove the meatballs to a plate and let them rest for a minute while you finish the sauce.
Speaking of sauce...while the meat is cooking, combine the Hoisin sauce, soy sauce, onion powder, garlic powder, ginger, rice vinegar, and most of the beef broth in a saucepan over medium heat.
Reserve about 1/4 cup of the broth for later. Whisk the ingredients together until well combined. In a separate small bowl, whisk the cornstarch with the remaining beef broth. Add this mixture to the sauce pan, stirring frequently. When the cornstarch is well incorporated, add the brown sugar to the sauce pan and whisk into the sauce. Let the sauce come to a boil, stirring frequently. Reduce the heat to medium low so it can simmer a little bit. It should start to thicken slightly because of the cornstarch. Make sure to stir it frequently.
Remove the oil from the skillet you cooked the meatballs in. Pour the sauce into the skillet and continue stirring occasionally over medium heat. It will simmer a little bit, but don't let it get too hot or else the sugar will burn and be disgusting. The sauce should continue to thicken slightly. Add the meatballs to the skillet and coat them well with the sauce.
Continue cooking until the sauce has cooked down and become almost like a slightly liquid glaze, and the meatballs remain coated with the sauce.
Serve over rice (I used instant white rice), or rice noodles, or whatever Asian carbohydrate you prefer. The flavor of the meatballs in the sauce will be relatively strong, so a more neutral base would be best.Yay for a successful Asian-style meal! :)
Friday, January 7, 2011
Some New Year/New Stuff Housekeeping
Hello blog world!
For those of you who follow this blog regularly, you may have noticed a few new things on my blog. I just wanted to take a moment and tell you all about them and how to take advantage of them. :)
First of all...you may have noticed there are now links to other posts under each blog post. This will link you to other recipes you might enjoy. I hope this is helpful in finding some of the older posts you may not see as frequently, and giving you some new ideas of what to make.
You may also notice I have pages at the top of the blog now. It gives a little more information about me, my blog, and other stuff I like or that you may find interesting. There is also a contact tab to let you know how to contact me. And finally, there is a tab about my cookbook, which shows the cover art and links you to where you can purchase it.
I hope all these additions are viewed as improvements and not annoyances. Feel free to comment and let me know what you think! Enjoy the picnic!
For those of you who follow this blog regularly, you may have noticed a few new things on my blog. I just wanted to take a moment and tell you all about them and how to take advantage of them. :)
First of all...you may have noticed there are now links to other posts under each blog post. This will link you to other recipes you might enjoy. I hope this is helpful in finding some of the older posts you may not see as frequently, and giving you some new ideas of what to make.
You may also notice I have pages at the top of the blog now. It gives a little more information about me, my blog, and other stuff I like or that you may find interesting. There is also a contact tab to let you know how to contact me. And finally, there is a tab about my cookbook, which shows the cover art and links you to where you can purchase it.
I hope all these additions are viewed as improvements and not annoyances. Feel free to comment and let me know what you think! Enjoy the picnic!
Thursday, January 6, 2011
Cheeseburger Pastry
So...I have vowed that for this year, I am going to try to make a new recipe once a week. That may mean I get a little...creative. This might be one of those times. Haha.
Not too long ago, I made cheeseburger pizza. I was...not too smart, and made a whole lb of burger flavored beef instead of the 1/4 to 1/2 lb I would have needed. So I had some extra burger flavored beef. I didn't want to waste it, so I came up with this recipe to try to use most of it up. It turned out pretty well, I think, even though it might be considered a little bit odd. Give it a shot. it's kinda fun. :)
Ingredients:
-1/2 lb ground beef
-1/2 teaspoon worceistershire sauce
-1/2 tablespoon ketchup
-1/2 tablespoon mustard
-1/2 teaspoon onion powder
-1/2 cup shredded cheddar cheese
-1 sheet frozen puff pastry
Directions:
Thaw the puff pastry according to package directions. While it's thawing, mix together the meat, worceistershire sauce, mustard, ketchup, and onion powder. Set it aside.
Preheat the oven to 400 degrees. Cut the pastry sheet in half. Place a layer of the cheese on one half of each piece of pastry, leaving a clean edge around it so you can seal it later. Form about half the meat into a patty that will fit over the layer of cheese. Add a little more cheese over the meat. Moisten the edge of the pastry, just a little. This will help it stick together. Carefully fold the pastry over the meat and cheese and seal the edges with a fork. Place the pastries onto a baking sheet. Bake for about 15 minutes, until the pastry is golden brown and the meat is cooked through inside. Enjoy your fancy "cheeseburger!"
Not too long ago, I made cheeseburger pizza. I was...not too smart, and made a whole lb of burger flavored beef instead of the 1/4 to 1/2 lb I would have needed. So I had some extra burger flavored beef. I didn't want to waste it, so I came up with this recipe to try to use most of it up. It turned out pretty well, I think, even though it might be considered a little bit odd. Give it a shot. it's kinda fun. :)
Ingredients:
-1/2 lb ground beef
-1/2 teaspoon worceistershire sauce
-1/2 tablespoon ketchup
-1/2 tablespoon mustard
-1/2 teaspoon onion powder
-1/2 cup shredded cheddar cheese
-1 sheet frozen puff pastry
Directions:
Thaw the puff pastry according to package directions. While it's thawing, mix together the meat, worceistershire sauce, mustard, ketchup, and onion powder. Set it aside.
Preheat the oven to 400 degrees. Cut the pastry sheet in half. Place a layer of the cheese on one half of each piece of pastry, leaving a clean edge around it so you can seal it later. Form about half the meat into a patty that will fit over the layer of cheese. Add a little more cheese over the meat. Moisten the edge of the pastry, just a little. This will help it stick together. Carefully fold the pastry over the meat and cheese and seal the edges with a fork. Place the pastries onto a baking sheet. Bake for about 15 minutes, until the pastry is golden brown and the meat is cooked through inside. Enjoy your fancy "cheeseburger!"
Monday, January 3, 2011
Garlic Chicken and Broccoli Pasta
I like garlic. I use it in a lot of my cooking. So I decided to make something garlic-y for dinner. This meal will be pretty garlic-y, so if you're not a fan of garlic, well...this may not be your bag. But it's so yummy. And it's super easy. This would be a great weeknight dinner when you don't have a ton of time. And it would be supper easy to make a ton of it for a big family or a group. I only made enough for the two of us (or so I thought), so I used about half a box of pasta, and only made enough sauce for that. I'm giving you a doubled recipe of what I made, so it would easily feed 4 people, I think. We actually had a whole serving left over after eating probably a little more than we should have. Haha.
And, it has broccoli in it, which means it's good for you, right? Hehe. Ok, so the cream and butter might offset that a little bit, but, meh. You know me. I love me some butter and cream. At least I'm throwing in some green veggies and protein to go with it. Yum. So good. And here we go.
Ingredients:
-1 lb pasta, a.k.a. a whole box (I used rotini, but anything would work, really)
-2 chicken breasts, cubed
-1 head of broccoli, cut into smallish florets (you could use more if you wanted more veggies)
-at least 5 cloves of garlic, minced very finely (I told you it would be garlic-y, I actually used a little more than that)
-olive oil (about 4 tablespoons, enough to cook the chicken in, then sautee the broccoli and garlic-I used 2 tablespoons for the chicken, then added 2 more for the broccoli and garlic)
-4 tablespoons butter
-4 tablespoons flour
-2.5 cups chicken broth
-1 cup cream
-salt and pepper to taste
-parmesan and mozzarella cheese, for garnish
Directions:
In a large pot, boil the pasta until tender. Drain and set aside.
While the pasta is cooking, heat a large skillet over medium heat. Add half your olive oil to the skillet and let it heat up, then add your cubed chicken. Cook until it's almost cooked through.
Add a little bit more olive oil if needed, reduce the heat slightly, then saute the broccoli with the garlic until the broccoli is slightly tender and the garlic is golden.The garlic needs to be finely minced. How finely? As finely as you can possibly get it. Mine looked like this:
Stir it frequently so the garlic doesn't burn. That would be bad...very bad. Ick. Burned garlic= bitter nastiness.
When the broccoli and garlic are done sauteing, move everything over to the side of the pan. Melt your butter in the empty side, then whisk in the flour to make a roux. Combine the roux with everything else in the skillet. Add one cup of the chicken broth and stir to combine it well with the roux. The sauce will start to thicken slightly. Add the second-and-a-half cup of chicken broth and stir to combine well. Let the sauce thicken slightly, stirring occasionally. When the sauce is thickened and you're almost ready to serve, add the cup of cream and stir to combine. Let it get heated up into the sauce. When the sauce is hot and well combined, pour the drained pasta into the sauce and coat well. Serve hot and enjoy the yumminess! Mmmm. So good.
And, it has broccoli in it, which means it's good for you, right? Hehe. Ok, so the cream and butter might offset that a little bit, but, meh. You know me. I love me some butter and cream. At least I'm throwing in some green veggies and protein to go with it. Yum. So good. And here we go.
Ingredients:
-1 lb pasta, a.k.a. a whole box (I used rotini, but anything would work, really)
-2 chicken breasts, cubed
-1 head of broccoli, cut into smallish florets (you could use more if you wanted more veggies)
-at least 5 cloves of garlic, minced very finely (I told you it would be garlic-y, I actually used a little more than that)
-olive oil (about 4 tablespoons, enough to cook the chicken in, then sautee the broccoli and garlic-I used 2 tablespoons for the chicken, then added 2 more for the broccoli and garlic)
-4 tablespoons butter
-4 tablespoons flour
-2.5 cups chicken broth
-1 cup cream
-salt and pepper to taste
-parmesan and mozzarella cheese, for garnish
Directions:
In a large pot, boil the pasta until tender. Drain and set aside.
While the pasta is cooking, heat a large skillet over medium heat. Add half your olive oil to the skillet and let it heat up, then add your cubed chicken. Cook until it's almost cooked through.
Add a little bit more olive oil if needed, reduce the heat slightly, then saute the broccoli with the garlic until the broccoli is slightly tender and the garlic is golden.The garlic needs to be finely minced. How finely? As finely as you can possibly get it. Mine looked like this:
Stir it frequently so the garlic doesn't burn. That would be bad...very bad. Ick. Burned garlic= bitter nastiness.
When the broccoli and garlic are done sauteing, move everything over to the side of the pan. Melt your butter in the empty side, then whisk in the flour to make a roux. Combine the roux with everything else in the skillet. Add one cup of the chicken broth and stir to combine it well with the roux. The sauce will start to thicken slightly. Add the second-and-a-half cup of chicken broth and stir to combine well. Let the sauce thicken slightly, stirring occasionally. When the sauce is thickened and you're almost ready to serve, add the cup of cream and stir to combine. Let it get heated up into the sauce. When the sauce is hot and well combined, pour the drained pasta into the sauce and coat well. Serve hot and enjoy the yumminess! Mmmm. So good.
Saturday, January 1, 2011
Chicken Noodle Soup
My poor husband has contracted a case of the winter yuck, as I call it. You're not "sick," like having a fever, you don't feel bad enough to stay home from work. But you just feel yuck. Congestion, coughing, all that fun stuff. So when he got home today, he took a nap and requested chicken noodle soup when he woke up. It was not something I had planned to make, but how can you say no to your wonderful husband when he doesn't feel well? So...I searched my pantry and my fridge to find the stuff I needed to make chicken noodle soup.
I found a couple different types of noodles, a couple carrots, and some chicken bouillon. I had frozen chicken breasts in the freezer. I was golden. I don't like celery. It tastes like dirt to me or something. I can't stand it. So I wouldn't add that to my chicken noodle soup even if I had it, which I didn't...since I won't eat it. Haha. So...this was a meal of necessity, but it turned out pretty well. Enjoy!
Ingredients:
-5 cups chicken broth
-5 cups water
-1 cup cubed chicken pieces, uncooked
-2 carrots, peeled and chopped
-2 cups of uncooked pasta
-1.5 tablespoons onion powder
-1/2 teaspoon celery salt
Directions:
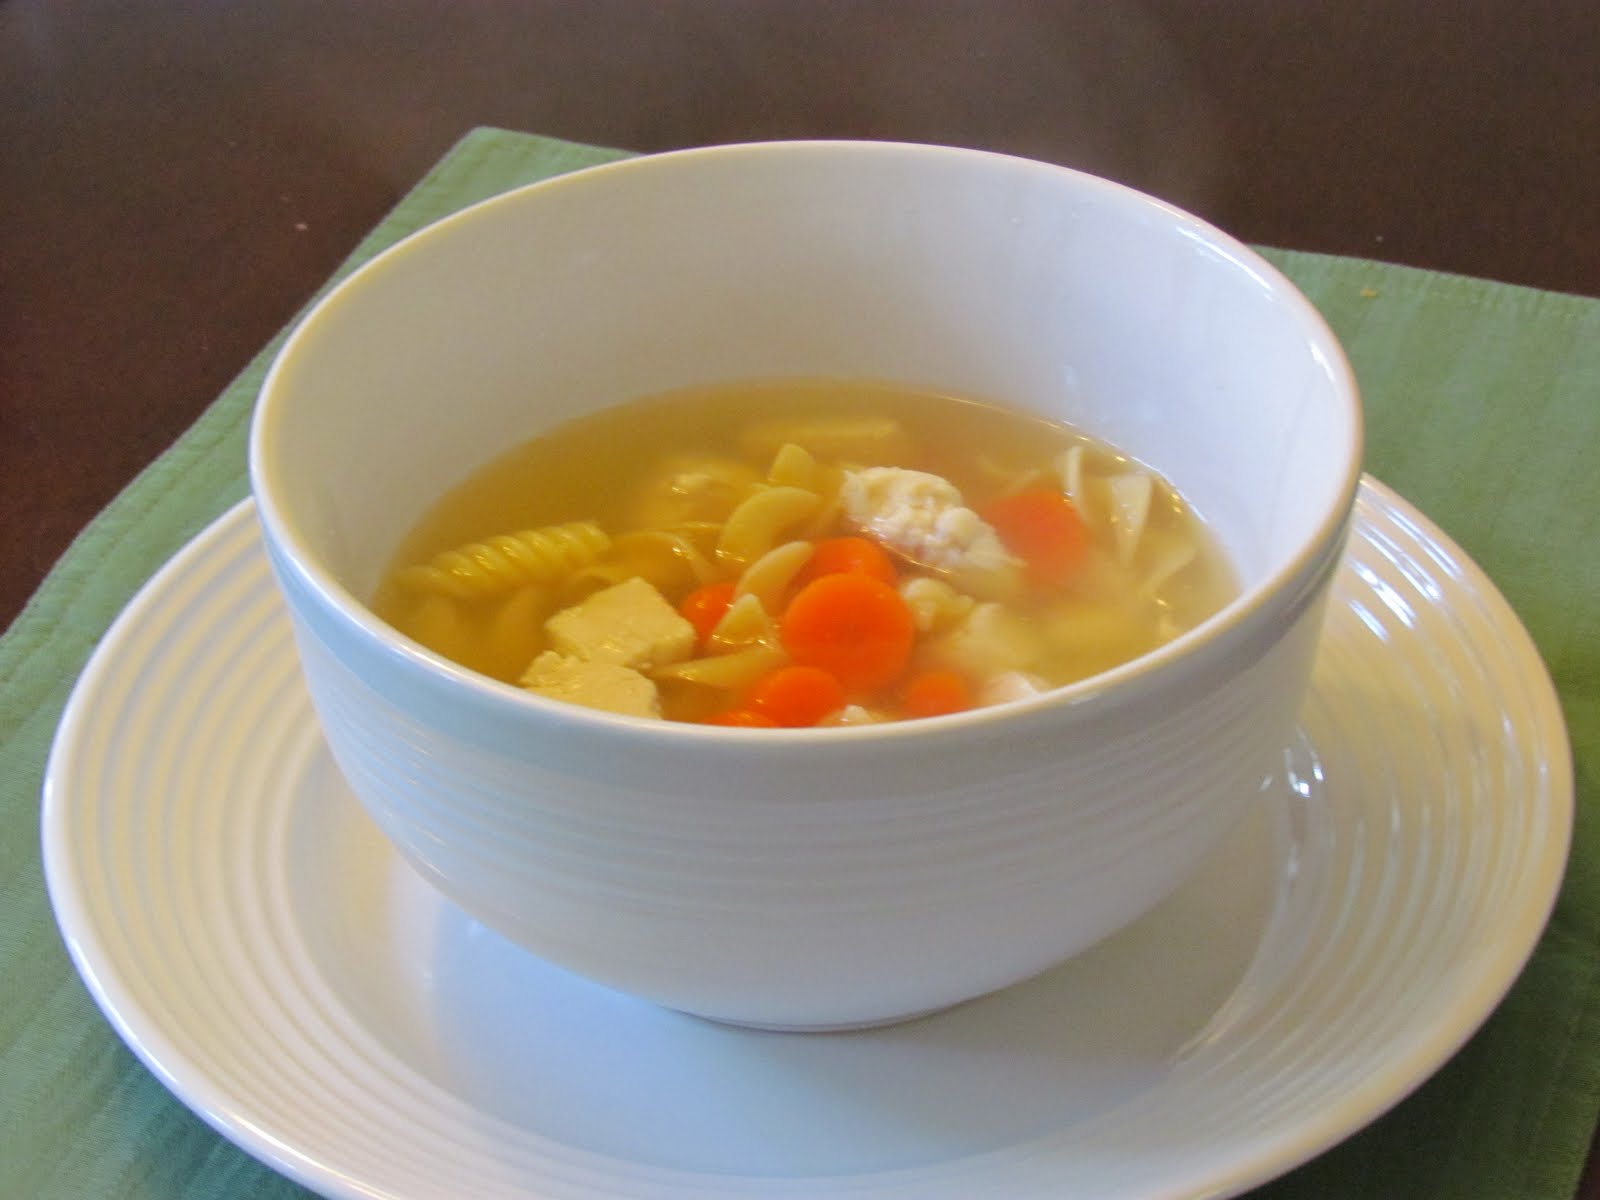
In a large pot over high heat, boil the water and broth. Add the chicken and cook for about 2 minutes. Add the carrots and cook for another couple minutes. Add the pasta and cook another 10 minutes or so, until the pasta is tender. After adding the pasta, add the onion powder and celery salt. Stir to evenly distribute. When the pasta is tender, the carrots are cooked, and the chicken is cooked through, it's done. Serve hot and enjoy!
I found a couple different types of noodles, a couple carrots, and some chicken bouillon. I had frozen chicken breasts in the freezer. I was golden. I don't like celery. It tastes like dirt to me or something. I can't stand it. So I wouldn't add that to my chicken noodle soup even if I had it, which I didn't...since I won't eat it. Haha. So...this was a meal of necessity, but it turned out pretty well. Enjoy!
Ingredients:
-5 cups chicken broth
-5 cups water
-1 cup cubed chicken pieces, uncooked
-2 carrots, peeled and chopped
-2 cups of uncooked pasta
-1.5 tablespoons onion powder
-1/2 teaspoon celery salt
Directions:
In a large pot over high heat, boil the water and broth. Add the chicken and cook for about 2 minutes. Add the carrots and cook for another couple minutes. Add the pasta and cook another 10 minutes or so, until the pasta is tender. After adding the pasta, add the onion powder and celery salt. Stir to evenly distribute. When the pasta is tender, the carrots are cooked, and the chicken is cooked through, it's done. Serve hot and enjoy!
Subscribe to:
Posts (Atom)